Toning (Part II)
13th July 2020
Toning these days is purely a creative decision. Not every image benefits from toning, though many can. I'm not suggesting anyone goes mad and tones every image they have. It should work with the image to evoke or enhance mood or feel. Some images respond better to particular tones than others. Those are my observations, there are no rules.
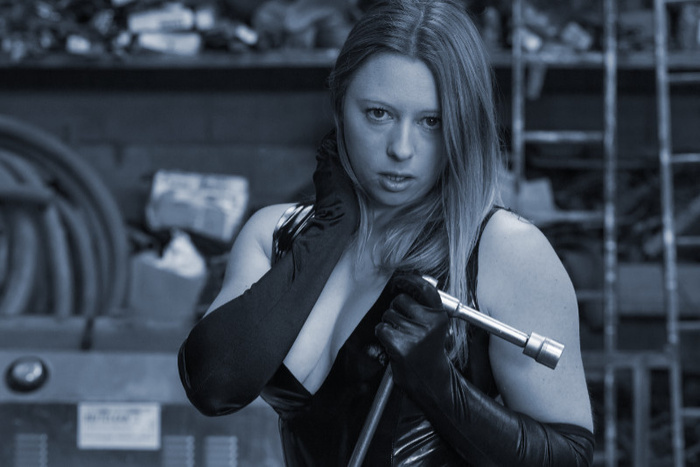
A happy smiling portrait would look good with sepia. You may think blue toning is cold and unattractive? Done with a hint and a complementary pose or location it can be very effective. It's all about creating, suggesting or enhancing mood. Green toning of a portrait though? Less so, but never say never. Green toning of a forest interior? Not widely used but a possibility.
Let's start with the colour image. I may or may not have taken it with the intention of going mono or even as far as toning. In a fast paced shoot there may not be time. In other cases I discount colour entirely, jut looking at the shapes and lines in front of me. On the other hand it's something I consider when I review a shoot or even months later when I think 'yes, that would work nicely there'. However, in all cases I ensure the start image is adjusted for black and white points, has good shadow detail and is properly colour balanced. That gives the best start for mono conversion.
There are many different mono interpretations of an image that we'll take it as read that we're happy with the result. In fact, I may do a few different conversions of an image because they all have their own appeal.
Using Nik SilverEfex
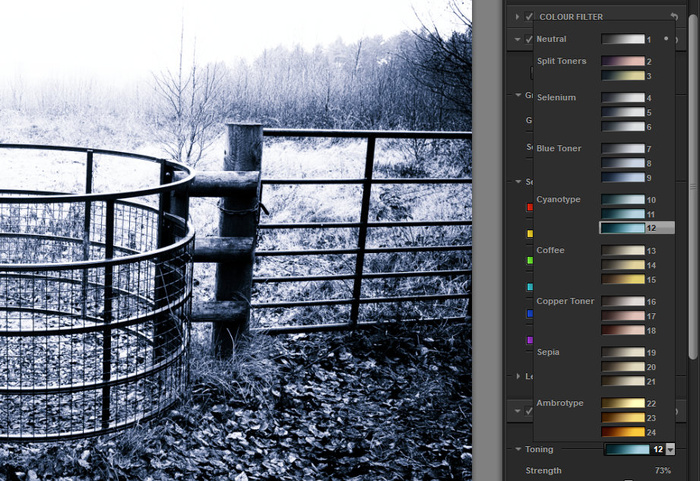
This is my main route simply because there are a range of built in toning choices and the majority of my mono conversions are done using this plug-in because of the amount of options and control available with a minimum of fuss. Even with a ready done mono image a quick run into SilverEfex gives me rapid and easy access to the toning tool.
Using Affinity Photo
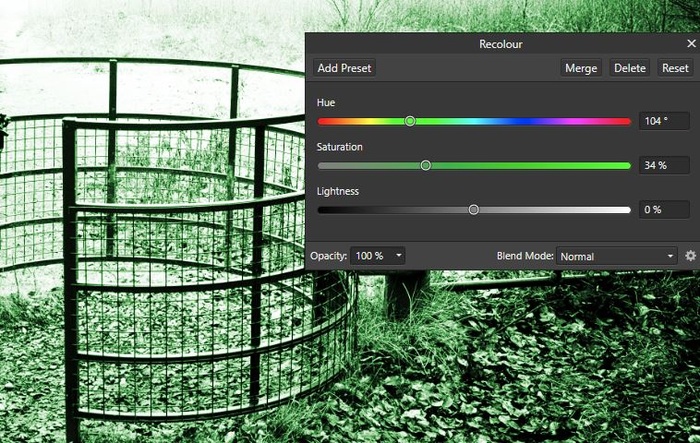
The Black and White adjustment is very good and if that's all I want without wanting to emulate a particular film type or style in SilverEfex it's quick and simple. The Recolour adjustment allows me to choose any colour tone and its intensity. It's possible to set up a Macro or LUT to consistently apply a particular tone you like though I suggest you then utilise Layers (if you don't already) so you can control the strength of the effect.
So far I've covered the use of a single tone. Next time I'll look at using different tones together.
All text and images © Keith Rowley 2020
A happy smiling portrait would look good with sepia. You may think blue toning is cold and unattractive? Done with a hint and a complementary pose or location it can be very effective. It's all about creating, suggesting or enhancing mood. Green toning of a portrait though? Less so, but never say never. Green toning of a forest interior? Not widely used but a possibility.
Let's start with the colour image. I may or may not have taken it with the intention of going mono or even as far as toning. In a fast paced shoot there may not be time. In other cases I discount colour entirely, jut looking at the shapes and lines in front of me. On the other hand it's something I consider when I review a shoot or even months later when I think 'yes, that would work nicely there'. However, in all cases I ensure the start image is adjusted for black and white points, has good shadow detail and is properly colour balanced. That gives the best start for mono conversion.
There are many different mono interpretations of an image that we'll take it as read that we're happy with the result. In fact, I may do a few different conversions of an image because they all have their own appeal.
Using Nik SilverEfex
This is my main route simply because there are a range of built in toning choices and the majority of my mono conversions are done using this plug-in because of the amount of options and control available with a minimum of fuss. Even with a ready done mono image a quick run into SilverEfex gives me rapid and easy access to the toning tool.
Using Affinity Photo
The Black and White adjustment is very good and if that's all I want without wanting to emulate a particular film type or style in SilverEfex it's quick and simple. The Recolour adjustment allows me to choose any colour tone and its intensity. It's possible to set up a Macro or LUT to consistently apply a particular tone you like though I suggest you then utilise Layers (if you don't already) so you can control the strength of the effect.
So far I've covered the use of a single tone. Next time I'll look at using different tones together.
All text and images © Keith Rowley 2020